
How to create a universal ReactJS application with bare ReactJS
Previously in the adventures series
![]()
In the last post we decided to use following tools:
- Server side Javascript rendering – Express as the frontend server
- JS written in EcmaScript6 syntax – transpiling ES6 to ES5 using Babel loaded through Webpack
- Stylesheets written in Sass – transpiling SASS into CSS using sass-loader for Webpack
- All Javascript bundled in one file and all stylesheets bundled in another file – Webpack
- To minify assets (js, css) for production – Webpack
- A mechanism to watch for changes and transpile on the fly in development mode, to speed up workflow – Webpack
- Something to handle external dependencies – npm
Now we’ll learn how to set them up.
Idea
We will be creating a simple application for rating submissions. This is a really simplified version of the application we used for evaluating submissions for a RailsGirls event.
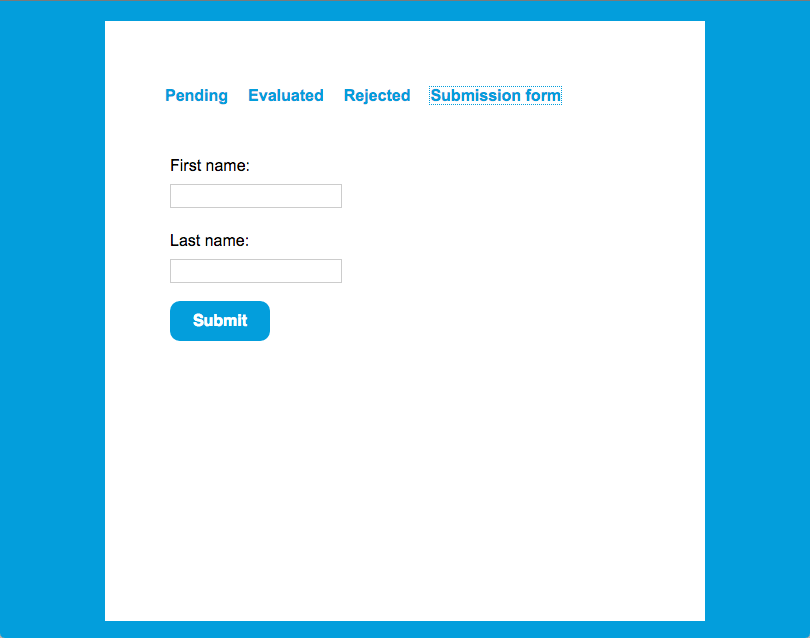
We need a form for creating new submissions:
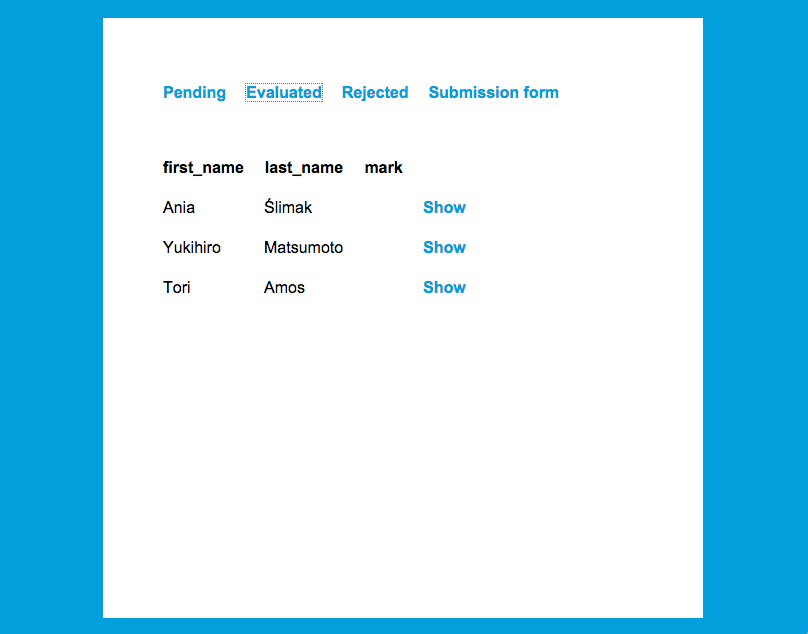
We will display pending, evaluated and rejected submissions in separate but similar listings. All listings will have “first name” and “last name” columns, evaluated submissions will additionally have a “mark” column and rejected will have a “reason” column.
The last view that we need is the detailed submission view with the rating.

Dependencies
Firstly, let’s create package.json with the application dependencies:
Take a look at the scripts key, it’s where we define the application tasks:
- babel-node – to be able to write server.js file in ES6
- start – for starting the server in development mode
- build – for building production assets
- production – for starting the server in production mode
To install the specified dependencies run npm install from the console, in the project directory.
Babel 6 requires also .babelrc file. Let’s create it then:
To start the server execute npm start.
To run in production mode execute npm run build first and then npm run production.
Server
As you can see, we are running the server by executing server.js. We need to create it then:
Now let’s understand what different parts of this code do. This line creates an Express application:
Which we’ll configure later:
And then we start the actual server:
Index
By default Express looks for the view to render in the views directory, so let’s create our index.ejs there:
There are two important things going on here. Firstly, this is the div where all of our app will be injected:
Secondly, we attach bundle.js (and bundle.css) only in development:
It’s important to do it only for development because in production we’ll have our assets minified with fingerprints (e.g. bundle-9bd396dbffaafe40f751.min.js). We’ll use the Webpack plugin to inject javascript and stylesheet bundles for production.
Webpack
Development config
We included bundle.js, but we don’t have it yet, so let’s configure Webpack. Create a webpack directory and inside add the file development.config.js:
- entry – defines entry points, the places from which Webpack starts bundling your application bundles (see the actual value in the shared config below – two entry points, one for stylesheets, one for javascript)
- output – defines where the output file will be saved, how it will be named and how you can access it from the browser
- module – defines loaders (for transpiling ES6, sass, etc.)
- plugins – defines plugins (e.g. we use ExtractTextPlugin to extract the stylesheets to a separate output file)
Some parts will be shared between development and production, so I extracted them to default.config.js:
As you can see, here we configure:
- how our bundle will be named,
- on which port our server will start,
- where our static assets will be served from (we use it in server.js),
- entries which are the starting points for bundling,
- loaders which we want to use:
- babel-loader for ES6,
- css-loader for ExtractTextPlugin
- sass-loader for Sass
Production config
As I mentioned, for production we want assets to be minified and attached in HTML with fingerprints. That’s why we need a separate config:
Entry points
We specified entry points to our application as: src/application.js, css/application.scss – but we don’t have them yet. Let’s add them!
Create application.scss in the css directory:
Also download these two css files and save them in the css directory: main.scss, normalize.css. Then create an application.js file in the src directory:
This file is the entry point for our client side application. Notice the render method – it’s responsible for injecting your component tree into the specified element. For us, it’s the div with “app” id.
Routes
In application.js we imported the routes.js file that we don’t have yet.
Let’s create only two routes for now:
This means that when we go to /submissions/new, the SubmissionFormPage component will be rendered. But notice that the route is nested in the / route, which is assigned to the Main component.
It’s because we want Main to be some kind of layout component, with the menu, which will be visible all the time.
And all its child routes will be rendered inside the Main component thanks to the this.props.children directive:
And in SubmissionFormPage we would have the actual form:
Create the above components in src/components directory. As you can see, each ReactJS component has a render method which defines the HTML to be rendered. It’s not pure HTML, it’s HTML in Jsx syntax, to make it easy to write HTML in Javascript code.
Connection to API
In the above file, you could also notice that when submitting the form we make a request to the backend API. We will use Axios to do this. Let’s create src/lib/Connection.js:
Displaying submissions
To check if everything works, it would be convenient to be able to see the pending submissions list, so let’s create PendingSubmissionsPage:
As you can see here, in componentDidMount we load submissions from the API and assign them to the local component state. Then we pass them to the SubmissionsList component which is responsible for rendering the table. SubmissionsList:
Backend
To have some kind of backend, you can clone and setup this very simplified backend app. Just follow instructions in the README.
Starting the app!
Now we can finally test if everything works. Run npm start in the console, and go to http://localhost:3000 in your browser.
Rating
Now we can implement the rating feature itself.
Let’s add SubmissionPage:
Again, in componentDidMount we load particular submissions from the API and assign them to the local component state. But the most important part is this:
We pass performRating handler as props to the Rate component:
And again pass performRating further, to the RateButton component, where we have actual rate value defined.
Here, finally, we have it bound to the onClick event because only here do we know the particular value for a rating – this.props.value
Thanks to that, when a user clicks a rate button, the performRating method defined in SubmissionPage is called and a request to the API is made.
Let’s add a route to the src/routes.js to be able to access the view:
That’s all!
We just created a simple application using bare React.
The important thing to notice is that we hold the state of the app in many places. In a more complicated application, this can cause a lot of pain :)
In the next post, we’ll update our app to use a more structured pattern for managing the state – Flux.
For now, you can practise a bit by adding the missing EvaluatedSubmissionsPage and RejectedSubmissionsPage.
The full code is accessible here.
See you next week!